Pages

Tuesday 15 January 2013

Making coconut flour and coconut butter

Shredded coconut spread on a tray drying out in the oven
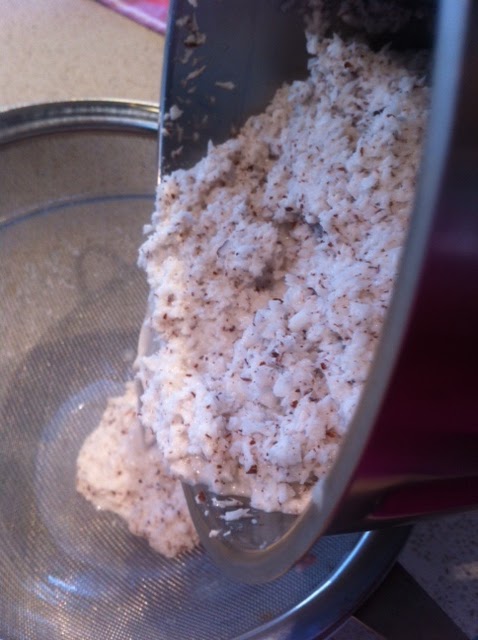
Coconut flour (this photo doesn't show how fine it actually turned out)
Starting to change from a solid into a yummy coconut butter liquid

Runny coconut butter
 

If you haven't read the previous post (how to make coconut water and coconut milk), it's best to read through that first as this is continued on from there.

After you've drained all the coconut milk from the shredded coconut, spread the shredded coconut onto a tray and either put it in the oven at a low heat (about 90 degrees celcius) for about 6 hours, or until completely dry, or if the weather is warm you can leave the tray for a few days and it will dry out.  

To make the coconut flour, it's as simple as putting the dehydrated shredded coconut into the Thermomix and blitz on speed 10 for about 4 seconds.  Don't over-blitz as it will start to liquify (forming the butter).

To make coconut butter, blitz the dehydrated shredded coconut in the Thermy for 2-3 mins at 37 degrees celcius speed 7.  Scrape sides down and repeat.

Keep doing this (you can leave it for a lot longer periods without scraping after the initial couple of times though) until it turns into a liquid.  Using larger amounts of shredded coconut liquifies more quickly, whereas smaller amounts will take slightly longer.

If you want the appearance of the butter and flour to be pure white, all you need to do right at the beginning of the process, once you've pried the coconut flesh from the shell, is use a peeler to peel the thin brown covering off the coconut.  This will give you a complete white flour and butter.  As the colour doesn't alter the taste, I left the brown on my coconut, which gives the flour and butter a chocolately look.

This can be stored in the pantry.  It will solidify after a while.

These products are so incredibly delicious and so healthy to use in cooking and baking and I am now using them quite frequently.  This is such a cost effective way of having plenty on hand!

Monday 14 January 2013

How to make coconut water and coconut milk

Coconut with the soft 'eye' pearced
Coconut water ready to be strained


Use a blunt knife to carefully pry flesh from the hard shell


After being blitzed in the Thermomix with boiling water

Strain through a sieve
Delicious, fresh coconut milk


I was all geared up to cook Thai Basil Chicken tonight (I'll share the recipe soon - it was really yummy) but realised I didn't have coconut milk which the recipe requires.

I stopped by our local supermarket to get a can of coconut milk but as I didn't have the kids with me, I actually had a bit of time to check the ingredients list.  I couldn't believe how many numbers appeared there!  One brand actually didn't have coconut in it - just coconut flavour!

I decided that today would be a good day to get a fresh coconut and start making my own coconut products!

So, here's the steps to make your own coconut milk.

To find a fresh coconut, check that it has three 'eyes' and give it a gentle shake to make sure you can hear the liquid inside.  This is the coconut water.

Firstly, you'll need to drain the coconut water.  Just get the tip of a sharp knife and poke the soft 'eye' of the coconut. You'll hear a soft hissing sound once you create a puncture, make the hole as big as you can by carefully using the tip of the knife.

Drain the coconut water out of the coconut into a clean bowl.  You will then need to strain this liquid to get rid of any other coconut residue.  You can use this water for so many purposes, such as smoothies, cooking or just to drink as a healthy treat.  I used some to mix the cornflour with in my Thai Basil Chicken recipe!

You will then need a hammer to tap firmly on the coconut until it cracks.  I used a chopping board to do this on.  Keep using the hammer to get the coconut to break into smaller chunks.

I then used a blunt ended knife and very carefully used the end to pry the coconut flesh from the hard shell.  You'll find a dark covering over the coconut flesh where the shell was.  If this bothers you, use a peeler to peel it and it will easily come away.  As it doesn't alter the taste at all, I just left mine.

I put the small chunks of coconut flesh into my Thermomix and added 3-4 cups of boiling water.  Then carefully bring the Thermomix to speed 10 (I did this very slowly in stages as you don't want the water to splash out) and blitz for about 30 seconds.

Pour the mixture over a strainer positioned over a large bowl.  Use clean hands to push the coconut milk through the strainer leaving just the shredded coconut.

It was seriously the best tasting coconut milk!  I used it straight away in my cooking which turned out brilliantly, filled with amazing flavour.

Coconuts and all that stuff!

The humble coconut
I recently came across a recipe that asked for coconut flour and coconut butter.  I managed to find the coconut butter (and it was so expensive) but couldn't find the flour.

I did purchase the coconut butter and used it so quickly.  It really is delicious and such a healthy substitute for normal butter.

It also has such a huge range of health benefits.  I decided this was definitely something I would use a lot of so I promptly decided to see if I could make my own.

I was surprised at how relatively easy it is.  I will go over the multiple uses you can have from just one coconut over the next few days...

Puff Pastry Quiche


Here is a pretty easy recipe for a yummy, healthy quiche using puff pastry as the base.

The best part about this recipe is that you can use up whatever ingredients you have in your fridge.

To get started, you'll need:

Puff pastry (I used two sheets)
4 eggs
Cheese (I used cheddar)
Parmesan cheese
Rosemary (the leaves)

and then you can use whatever you like to see appear in your creation.  I used:

Ham (cut up in 1cm cubes)
Silverbeet (sliced)
Sliced mushrooms

Then...

Preheat your oven to 190 degrees celcius (fan forced).

Line the bottom of a rectangular cake tin with baking paper and arrange the puff pastry on top.  Just fold over an excess as it will taste great around the edges.  Then arrange the silverbeet, mushrooms and ham over the top of the pastry.

In the thermy, put the rosemary and cheeses and mill on speed 8 for about 15 seconds.  Remove half of the cheese mixture and put aside.

Add to the other half of the cheese the remaining ingredients and mix for 10 seconds on speed 5.

Pour over the puff pastry and arrange the rest of the cheese mixture on top.  Bake for about 20 minutes until the pastry is golden.

I served this with a baby spinach and cherry tomato salad dressed with some freshly squeezed lemon and balsamic glaze.  So good!

Healthy cooking with the Thermomix - it's a start!

So, I have been creating quite a few meals with the pretty special Thermy as I so lovingly refer to it now, and have been looking everywhere for some inspiration. 

I have found some great sites that have creative recipes that have provided me with the inspiration I need to just create some easy to prepare meals for my young family, with the twist of minimum fat, and maximum freshness.  I do try to keep a balance though, so please understand that not all of my recipes will be super healthy.  Sometimes, it's just nice to have a treat!

I do love the idea of getting away from processed food if I can and love how Thermy helps me out in this endeavor but find that quite a few sites that provide healthy Thermomix recipes use quite obscure ingredients so my mission is to create healthy, yummy recipes using mostly readily accessible ingredients, that are inexpensive.

Sounds pretty impossible, but I am going to give it a go and hope that you enjoy the journey with me.